Tuesday 27 March 2012

28/2/12

Today we started the build,We had the building all outlined out on the ground using a chalk line.Once that was achieved we started cutting the timber to the required lengths for sole plates to fit the chalk lines.We had a 5mm gap inbetween the sole plates.Once this was all sorted out we went ahead and used the dyna drill to drill through the timber and into the concrete,after that we got the rattle gun and bolted the sole pates to the ground.The builders level and tripod was set up and I took measurements of each pile mark on the sole plates,these measurements were given to the person using the radial saw who cut the timber and then they were passed on to be nailed together.The next step was to measure out the piles.The in and over measurement was used to get them all in the correct place.2195mm distance for each pile.The piles were 3 bits of 4x2 timber nailed together.A nail gun was used to secure them to the plates.

Sole Plates.
Piles nailed to Sole Plates.
I went with my group and Mark next door to learn how to see if our builders level is doing the job it should be.We stationed the level and marked down three different vantage points.Once I had got the three points we re-stationed.Then went back and put new marks underneath the previous then measured the distance,our measurements were the same so it was bang on,If it wasnt then it needs to be sent away for a calibration test.

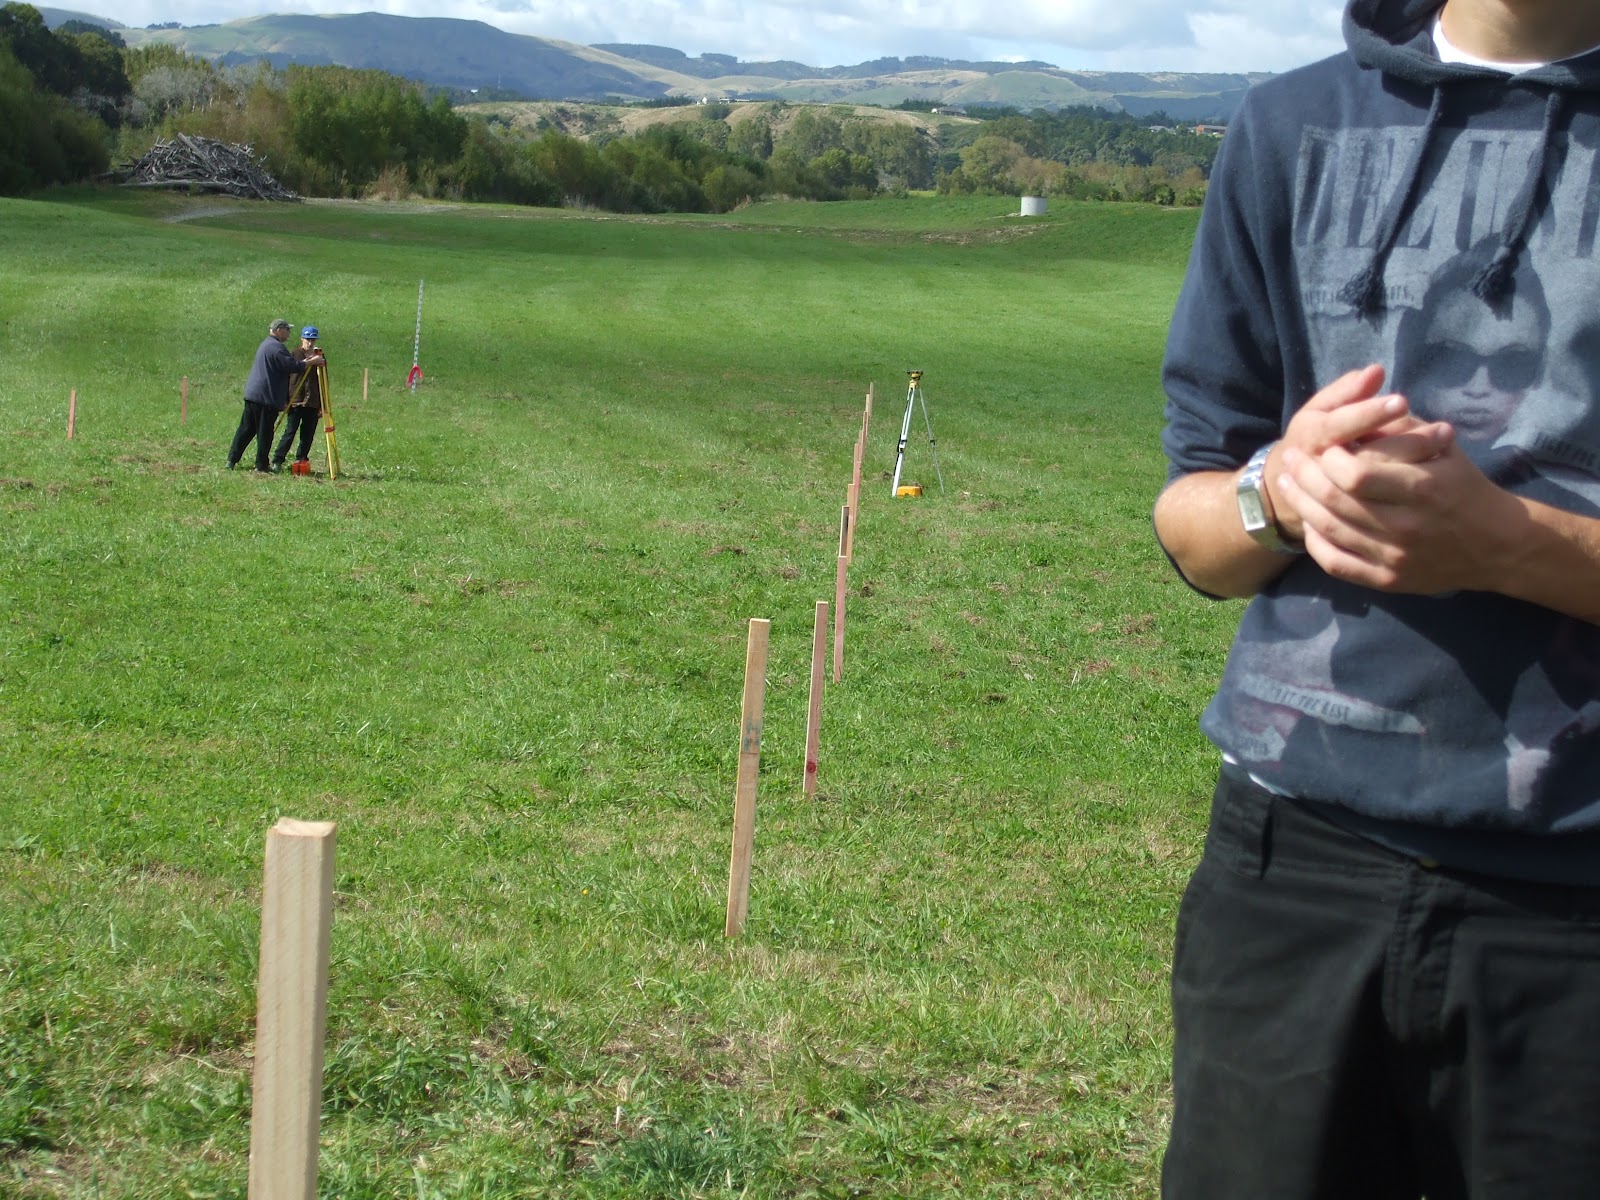
Me after I set up the builders level.
Our building has to comply with NZS 3604 for safety reasons."Basically the Builders Bible".

The tools I used today were,Builders Level,Tripod,Tape measure,Chalk line,Radial Saw,Rattle gun,Dyna drill,and a hammer.

We went over a few safety matters with the Radial Saw,Ear protection is to worn as it is quite loud,Safety glasses are to worn as the tip on the teeth could fly off and also wood chips or splinters can have a great effect on your eyes.Having the appropriate distance for your hand/arm away from the saw.No baggy clothing is to be worn,No stupidity while using this power tool as there could be serious consequences.Off cuts are to be put into the wood bin.Never cut timber with nails,as kick back can occur.

                             Theodolite
Matt taught us how to calculate the amount of bearers and piles we need for the build.We were taught the "In and Over"Calculations method.For example,For the Piles,Our length of our bearers are 15500mm,so 15500mm-135mm =15365,"The 135mm being the length of the pile" 15365mm divide by 7 piles = 2195mm  that's the distance between each pile.
Theodolite,A theodolite is a percision tool used mostly for surveying.These are used for measuring angles in horizontal and vertical planes.It is mounted onto a tripod with a screw underneath that mounts it on.The theodolite has 3 tilting disks to get it level.These are used on steep hills where it would be inappropriate to set up high profiles.

Laser Level

The laser level,is fixed to a tripod.Laser levels self level themselves so no tilting disks are needed.These only need one person to operate them,making the job fast and easy,A movable sensor is then used to get the correct heights.A beeping noise is usually going off when it is at the right height.


Builders Level


This is also set up on a portable tripod,The tripod is pushed into the groundand set to the correct height for the user,the level is then installed on the top with a bolt underneath,once this is done the tilting screws are then to be used to get the setup all level.A staff is then used by another person who is to have it standing straight at each spot level.so the reader can gain the numbers from the staff and determine the correct heights needed for a build.

Line of Collimation
This is the main line in the builders level used to read the numbers off the sopworth staff.

Stadia Lines
These are the lines above and below the line of collimation,These are used to gain the numbers on the sopworth,When the first number is seen accurately it is recorded,this process is then repeated for the next stadia line,once there are two numbers,it is the top stadia minus the bottom stadia,then the answer is x100,This gives you the distance from the builders level to the staff holder.


27/3/12

This morning we all gathered around the whiteboard and learned what we were going to be doing for the day,We were going to be setting up Building Profiles.This task included using pegs,nails,hammers,spirit levels,tripods,builders levels,sopworth staffs,stringline,30 metre tape line,builders tapes and mauls.

We all loaded up into the Vans and traveled back to the river once again.


First off,we needed to establish our boundary lines for the section of the house build,2 pegs are driven into the ground to represent the corners of the boundary,a string line is then attached.A third and fourth peg can then be added,along with more string.Once this is completed,we were then able to find where the first peg will be driven into the ground for the first corner of the house.

Once we had got there we got into groups and mauled in our first peg.Once we had our first peg in we measured 7200mm then placed our second peg into the ground.From the second peg we measured 15500mm then place our third peg,then 7200mm for our third peg.
Which left the last measurement of 15500mm from the third back to the first peg.Once we had got our pegs into the ground we did the 345 to get a 90 degree then did some pythagoras,15.5m square x 7.2m square = 17.091 which is the measurement we used for our hypotenuse/diagonal.After that Mark put a line on one of the pegs,That line represented our FFL-Finished Floor Level.
We then did the profiles on the outsides of the pegs.After we had them pegged down,we used the builders level and staff to transfer the heights to each corner peg and from then we were able to set the boards,A spirit level was then used to copy the FFL line to the corner pegs for the profile boards,a quick and easy step.then we attached the stringline and got it all even and square.We rechecked our diagonals and parallels and we were out by a 30 mm so we had to do a few adjustments,in the end we got there and completed the task.


Sunday 25 March 2012

26/3/12

-Set up Builders level.
-Use of Pegs,Sledge Hammer,Maul,Sopworth Staff,Measure Tape,Tripod and Builders level.
-To get measurements/heights in a straight line for a straight line cross section contour graph.

Pegs being driven in by sledge hammer.
Half of our straight line for the contour cross section graph.
Builders Level I set up.
Cam giving instructions.
So Today we all met up in the EShed as normal.We were given a sheet of paper to record our Back site,Intermediate site,Fore site,Rise,Fall,Reduced Level,Distance and Remark on.Once we were given this the lecturers explained what was to be recorded.Once we arrived to the river we were broken down into four individual groups.I paced out 50 steps in one direction from the top of the hill and another 50 on the opposite side.We then as a group placed the tape measure down and sledged in the pegs in 5 metre increments.Once we had done that we stationed the Tripod and Builders level at our first mark(Back site).From then we grabbed our first few readings off the staff that was held at every peg.We re stationed five times so everybody had a turn at each task.Once we had gained our heights we headed back to UCOL to be given a Cross section contour graph.We were all shown how to get our rise and fall numbers.We did this by taking the first intermediate site and subtracting it by the backsite,after that it was the first IS take away the following ect.If the answer was a + then it was added to the Rise,if it was a - then it was added to the Fall.Next up was the Reduced level,We started at 100 metres above sea level.and for the rise and fall we added and subtracted the numbers to get an end result.After we had gained the end result we took the last reduced measure and subtracted it by the first to get a mean,The next totals should match this.Then we added all the backsights and fore sites together then took them away from each other,the number we got matched the same end result as the Reduced level.We repeated the same method for the Rise and fall.After all of the numbers were sorted  I constructed a graph showing 11 of the numbers forming a side on view of the rough terrain.
My Straightline cross section contour graph.


My field data.


Tuesday 20 March 2012

21/03/12

-Class trip to the River.
-Set up Builders Level.

My Contour Plan results.
Today we went down to the river,We were split up into four groups of six.The equipment we had was,A Sopworth Staff,Builders Level,Tripod,Dazzle(Spraycan),and a 30 metre long tap measure.A member in my group sprayed a cross to represent the start of the grid.We set up the Builders level on the tripod and got it level.We sprayed the increments of 5 metre lines inbetween the 30 metre line which added up to six squares, after that we did the 345 to get an accurate line at 90 degrees.Then we replicated what we had done earlier.After we had the grid set up we got the Staff out and I used the builders level to gain the measurements using the line of collimation in the sight of the level.After we had finished that practical activity we headed back to UCOL.Matt showed us how to construct up a contour plan which is mainly used by achitects.The contour plans basically show how rough the terrain is.

Monday 19 March 2012

-Site Trip To Higgins Concrete Plant.
-In Class.

Today we all met up in the EShed for the lecturers and the remainder of the class to arrive.We then shifted off to a Class to learn about concrete and cement.Cement consists of broken down sand/rocks,Water and reinforcing.Lime is the main ingredient.We were all shown a video in regards to how the cement was made,It started with limestone which is broken down into smaller sized arrigates through a crusher,then dropped onto conveyer belts and feed to another crusher ready to be crushed to smaller sizes.After that they were dropped into a kiln,and heated up with additives.Then brought out and fan cooled till they were at an 80 degree heat.Yet to be broken down to a fine powder/dust.

After being in class for an hour we headed to the vans and drove to the Higgins Plant.Once we arrived we met the Site manager,Aaron Curry who gave us a tour around the site.I learn't that The silos in the plant hold up to 80 tonnes of cement at one time.Atleast one cement truck is always on the run 24/7.We were shown how the concrete was spun inside the bowl on the truck,Water is added to get the right consistentcy.Then A sample is taken out and tested,They call it the slump test,A small cone is filled up,1/3 at a time is added then pushed down 25 times to get most air out and compact as much down as possible.After that the cone is flipped upside down and a bar is placed on top with a rule measuring how much it slumps down.After that We were shown a concrete cylinder that has been stored for 28 days.They usually take three of these cylinders and then send them away to a lab for compression tests.We were then taken out back where the storage tanks containing additives,retarders,calcuim,Plasticisers ect.Past the tanks was the water tank that they use,

To be Continued....

Sunday 18 March 2012

-Travelled to ITM.
-Pythagoras,Maths.
-Set up Builders level and laser.
-Timber Terminology.
-Trusses.

Today we as a group travelled to ITM just outside of Palmy.We were shown the way that wallframing and trusses were constructed.The calculations are done via computers to get accurate cuts and angles.Trusses are to be built by someone who is qualified,you can't just make them and use them yourself.After they are nailed together they are put into seperate piles to make the build much more faster on site.We left ITM and headed back,Once we got back we moved onto the Timber Terminology.I learn't that Pinus Radiata is a widely used timber,mostly used on housing.It's a very strong and cheap wood to use.Easy to treat(Hazard Treatment,h1.3,h3.1,h3.2 ect) and easy to machine.After lunch we headed back for a Math session,Pythagoras,was the bulk of it,then we moved onto setting up the Builders level,The aim is to get the bubble in the circle to get an accurate reading on site,if not then the building could be all over the place.